Engine Block Testing - NCRS Discussion Boards

Engine Block Testing

Collapse
X
 
  • Time
  • Show
Clear All
new posts
  • Steve G.
    Expired
    • November 24, 2014
    • 411

    #16
    Re: Engine Block Testing

    Originally posted by Richard Mozzetta (13499)
    Very true.....this is what a "so-called" machine shop rebuilt for a buddy's engine. Shop owner blamed it on today's weaker cleaning chemicals!

    [ATTACH=CONFIG]57292[/ATTACH][ATTACH=CONFIG]57293[/ATTACH][ATTACH=CONFIG]57294[/ATTACH][ATTACH=CONFIG]57295[/ATTACH]
    [ATTACH=CONFIG]57296[/ATTACH][ATTACH=CONFIG]57297[/ATTACH][ATTACH=CONFIG]57298[/ATTACH][ATTACH=CONFIG]57299[/ATTACH]
    [ATTACH=CONFIG]57300[/ATTACH]
    The machine shop wasn't lying to your friend. Parts used to be hot tanked in caustic soda back in the day. You counted on a set of cam brgs if you had a block tanked because it would eat the bearing material off the backing. Aluminum parts couldn't be tanked, they'd dissolve in the tank. If there was paint on the part when it went in, there was none when it came out. Parts looked mostly like new when hot tanked.

    Parts are no longer cleaned like that. They are not submersed, they are washed in a wash cabinet that works like a dishwasher and uses hot soapy water. The detergent is environmentally friendly and bio degradable. Safe for aluminum. Will not remove the paint, never mind the scaled rust inside the water jackets. You're lucky if it makes it into the cooling system. The washers must have an oil skimmer to recover the oil/grease that comes off the parts. While the soapy water can be easily disposed of, the crud that settles in the bottom of the washer and it's tank must be disposed of in an environmentally acceptable manner.

    It's a whole different world out there.

    I took a crank that had rusted sitting in the trunk of a car into a machine shop. He said he could turn it, but had no way to remove the rust. If I brought it back to him cleaned of the rust he would be happy to do it.

    So, if you want your block nice and clean inside, you'll likely have to that part yourself. Plug all the cooling system holes and fill it with a muriatic or phosphoric acid solution. Then deal with disposing of your used acids.

    If the engine had run water or the coolant badly neglected you will have to remove the frost plugs and physically scoop the crap out before you try to clean it. I've removed frost plugs where there was a wall of rusty crud behind them. A full cooling system and nothing comes out when you remove the drain plugs. The bottom 2 inches of the block filled with crap.

    Where the machine shops are negligent is in explaining all this when they take a badly rusted engine in for work.

    Steve.

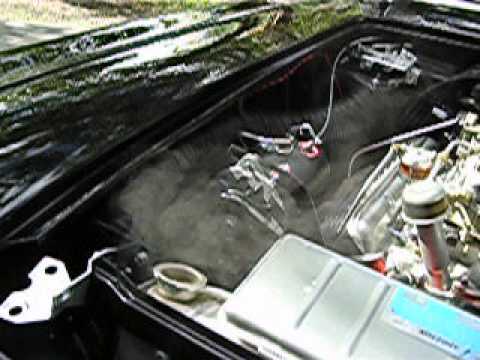
    BTW, photos 1 & 2 show nice fresh carbon in the exhaust crossover. A likely product if you run headers or, as I've read on here, wire open the heat riser valve.

    Comment

    • Duke W.
      Beyond Control Poster
      • January 1, 1993
      • 15610

      #17
      Re: Engine Block Testing

      Originally posted by Steve Garner (60691)
      Yes, I think that is exactly what I was saying.


      I would disagree to some extent on your list of "sins". No machine shop is going to throw roller tip rockers or a roller lifter cam unless instructed to do so by the owner. And while you may see these items as "hot rod" stuff, an owner (and an engine machine shop/engine builder) may see them as more about improving the live expectancy and efficiency of the engine by reducing friction. The purist in us may want to see all the OE parts, but then the oe built those cyl heads without removable guides. So is a roller tip rocker that reduces guide wear and hopefully avoids drilling out the head and installing a removable guide not an improvement in the "preservation" side of things? Even to most purists, rocker arms are throwaways, heads with the correct castings and dates are not. Low tension piston rings on coated skirt pistons save valuable cyl meat over the years in addition to reducing the friction loss. There are situations where deviating from original in the area of a consumable may be preferred in order to preserve the "non consumable". I'm more inclined to see a little lattitude on the internals for those reasons.

      Steve
      There have been many threads about "roller tip rocker arms" over the years, but since you're relatively new, I'll go over the arguments, again.

      The tip of production rocker arms is ground in an arc that is very close to the arc of the rocker arm motion. For this reason the rocker tip "rolls" across the top of the valve stem. It does not slide, so a roller tip is worthless.

      Roller trunnion rocker arms are a different story, but most will not fit under the production valve covers. They reduce friction and oil temperatures, but the primary benefit is on engines that see sustained operation above 5000 revs. Modern Chevy V-8s have roller trunnion rocker arms and these along with many other small details like piston fit and ring tension do help in meeting CAFE, but these rocker arms have plain tips with a curved surface that also roll over the valve stem.

      Roller tip rockers are a complete scam. They are heavy, which reduces valve train limiting speed, and many require a special thin wall socket to adjust the clearance/preload. The money is better spend massaging the heads and addressing known reliability issues with better parts like early (through '65) small block connecting rods and the early big block single spring/damper design that was prone to breakage.

      For road engines I always recommend standard tension rings. Low tension rings are okay for racing engines that spend most of their life at WOT, but road engines spend most of their time at idle and light load, so there is often not enough gas pressure to force the rings against the cylinder walls to create a good seal. The result is often excess blowby and/or excess oil consumption.

      As I've said many times before, road engines and racing engines are completely different animals, and installing "racing parts" in a road engine is often a recipe for poor performance, fuel economy, and excess oil consumption.

      The trouble with a lot of shops is that they make poor recommendations like high volume/high pressure oil pumps, higher than production overlap aftermaket cams, high rate valve springs, and "low compression pistons" claiming that the engine will "run better" or make "more power" (at the top end, maybe) but at the expense of power below 4000 RPM; but that can yield a soggy, unresponsive road engine. Most owners don't have a very good understanding of how engines work and end up placing faith in these guys. I wish I had a nickel for every owner who contacted me after the rebuild with a tale of woe rather than before embarking on the project, so I could provide good guidance and teach them how to manage their engine restoration project.

      I am certainly not averse to making modifications to vintage engine that yield better performance/reliabilty/longevity and have system engineered a number of "cheater motors" that provided more top end power, 500-1500 more useable revs at the top end while visually appearing to be all OE from the outside with idle behavior exactly like the original configuration. Head massaging is key, along with bullet proof rotating/reciprocating parts and careful (OE) valve spring setup to achieve maximum valve train limiting speed. I even designed a "cheater cam" for base engines that provides more top end power and useable rev range (6500+) while idling butter smooth (500 in neutral for manuals, 450 in Drive for automatics), and one passed a PV and won the coveted Duntov award.

      As far as block and head cleaning is concerned, I think most good shops today have ultrasonic cleaning tanks that use a water based solution with detergent, and this should remove internal cooling system passage scale and most if not all of whatever paint remains on the part.

      Duke

      Comment

      • Donald A.
        Expired
        • January 7, 2013
        • 239

        #18
        Re: Engine Block Testing

        This is all great information and if only we could put it in a bottle...

        First things first and back to the original post.

        Can we develop a detailed bullet list of all the critical elements that should be addressed when we have a bare block and engaging any machine shop??? This list should be captured in such a way that the less educated can effectively communicate all the details thus reducing the opportunity for disaster. I'm glad to compile on a Word document and then post a final.

        I'll Start

        1. Under no circumstances should the block be decked without consulting the owner or being directed to perform such an operation.

        Comment

        • Steve G.
          Expired
          • November 24, 2014
          • 411

          #19
          Re: Engine Block Testing

          Originally posted by Duke Williams (22045)
          There have been many threads about "roller tip rocker arms" over the years, but since you're relatively new, I'll go over the arguments, again.

          The tip of production rocker arms is ground in an arc that is very close to the arc of the rocker arm motion. For this reason the rocker tip "rolls" across the top of the valve stem. It does not slide, so a roller tip is worthless.

          Roller trunnion rocker arms are a different story, but most will not fit under the production valve covers. They reduce friction and oil temperatures, but the primary benefit is on engines that see sustained operation above 5000 revs. Modern Chevy V-8s have roller trunnion rocker arms and these along with many other small details like piston fit and ring tension do help in meeting CAFE, but these rocker arms have plain tips with a curved surface that also roll over the valve stem.

          Roller tip rockers are a complete scam. They are heavy, which reduces valve train limiting speed, and many require a special thin wall socket to adjust the clearance/preload. The money is better spend massaging the heads and addressing known reliability issues with better parts like early (through '65) small block connecting rods and the early big block single spring/damper design that was prone to breakage.

          For road engines I always recommend standard tension rings. Low tension rings are okay for racing engines that spend most of their life at WOT, but road engines spend most of their time at idle and light load, so there is often not enough gas pressure to force the rings against the cylinder walls to create a good seal. The result is often excess blowby and/or excess oil consumption.

          As I've said many times before, road engines and racing engines are completely different animals, and installing "racing parts" in a road engine is often a recipe for poor performance, fuel economy, and excess oil consumption.

          The trouble with a lot of shops is that they make poor recommendations like high volume/high pressure oil pumps, higher than production overlap aftermaket cams, high rate valve springs, and "low compression pistons" claiming that the engine will "run better" or make "more power" (at the top end, maybe) but at the expense of power below 4000 RPM; but that can yield a soggy, unresponsive road engine. Most owners don't have a very good understanding of how engines work and end up placing faith in these guys. I wish I had a nickel for every owner who contacted me after the rebuild with a tale of woe rather than before embarking on the project, so I could provide good guidance and teach them how to manage their engine restoration project.

          I am certainly not averse to making modifications to vintage engine that yield better performance/reliabilty/longevity and have system engineered a number of "cheater motors" that provided more top end power, 500-1500 more useable revs at the top end while visually appearing to be all OE from the outside with idle behavior exactly like the original configuration. Head massaging is key, along with bullet proof rotating/reciprocating parts and careful (OE) valve spring setup to achieve maximum valve train limiting speed. I even designed a "cheater cam" for base engines that provides more top end power and useable rev range (6500+) while idling butter smooth (500 in neutral for manuals, 450 in Drive for automatics), and one passed a PV and won the coveted Duntov award.

          As far as block and head cleaning is concerned, I think most good shops today have ultrasonic cleaning tanks that use a water based solution with detergent, and this should remove internal cooling system passage scale and most if not all of whatever paint remains on the part.

          Duke
          I had never considered the arc of the tip, but I am very familiar with the results of accelerated guide wear from high lift cams with standard length pushrods, which is why they seemed like a good idea to me.

          Most modern production engines today use a low tension ring relative to what was oe in the 60's and 70's. That is one of the reasons you can open up an engine today with 200K miles on it and still see cross hatch in the ring travel area when back in the day you'd be looking at .010 of wear under the ridge, if it could make it to 200. Piston and ring design have come a long ways.

          We are in total agreement about mods. They are generally about tradeoffs. Roller lifters, however, in production engines was a major game changer. With their ability to manage steeper ramps we can now get big duration without the poor quality idle.


          Yes, and hi volume oil pumps and 20-50 oil are for worn out engines or those built (for some reason) with .003 of bearing clearance. They have no place in a properly built new or reman engine.

          As to the op's request of a list, mine would look like this

          -cyl out of round and taper
          -ck for any cyl sleeves having been installed
          -deck flat and min corrosion around water jacket holes at deck surface
          -main bearing saddles and cap alignment as well as inspect for signs of physical damage to the bore itself and the thrust brg surface.
          -ck condition of the main caps around the top of the bolt holes for signs of cracking
          -clean and check all threaded holes paying particular attention to the head bolts threads at the deck. You look for signs of the threads pulling up slightly above the deck surface indicating that they've been moving
          -ck cam brg bores for damage
          -pressure test water jackets
          -ck for cracking or missing pieces elsewhere on the block, like the starter mount holes, webbing around the mains, frt mounting bosses etc.
          -Don't assume your machine shop washes with an ultrasonic cleaner, ask. I don't know of a one in my area. Everyone here uses cabinet spray washers, which will not remove cooling system scale. Granted, I live in a small city of 100,000 people.

          Comment

          • Roger G.
            Expired
            • October 11, 2012
            • 268

            #20
            Re: Engine Block Testing

            Originally posted by Steve Mitchell (58582)
            I purchased a SWC a year and a half ago. The bare, original block came with the car as part of the purchase. I have no idea why the engine was pulled from service, and the engine currently in the car was built with the heads, intake and distributor that came with the car - as near as I can tell anyway.

            A clue may lie in the fact that the engine is missing the rear main bearing cap - the other bearings are there. I am approximately the 10th owner of the car, and this block has followed it around the whole time, remarkably enough.

            I had the block inspected by a friend of a friend who said the block appears to be in good shape. It's never been bored, and there is barely a hint of wear in the cylinders where the top piston ring stops.

            Id like to finally reunite the block with its original components and the car. I took the block to a reputable machine shop and it's in the cue to be inspected. I asked for a pressure test, and if it passes that, they are going to find a bearing cap and align bore the block. Beyond that, they are going to check deck height, cylinder roundness, head surface.

            Is there anything else I should have them check before I proceed with the rebuild? I don't want to find something out the hard way that I could've caught at this stage.
            You didn't mention why they are going to align bore the block?

            Comment

            • Steve M.
              Expired
              • June 25, 2013
              • 28

              #21
              Re: Engine Block Testing

              Originally posted by roger gleason (55547)
              You didn't mention why they are going to align bore the block?
              Its missing the rear main bearing cap, so another one will be fitted.

              Comment

              • Greg H.
                Expired
                • June 30, 1985
                • 105

                #22

                Comment

                • Steve M.
                  Expired
                  • June 25, 2013
                  • 28

                  #23
                  Re: Engine Block Testing

                  Awesome tip!

                  - Don't deck the block.
                  - cyl out of round and taper
                  -ck for any cyl sleeves having been installed
                  -deck flat and min corrosion around water jacket holes at deck surface
                  -main bearing saddles and cap alignment as well as inspect for signs of physical damage to the bore itself and the thrust brg surface.
                  -ck condition of the main caps around the top of the bolt holes for signs of cracking
                  -clean and check all threaded holes paying particular attention to the head bolts threads at the deck. You look for signs of the threads pulling up slightly above the deck surface indicating that they've been moving
                  -ck cam brg bores for damage
                  -pressure test water jackets
                  -ck for cracking or missing pieces elsewhere on the block, like the starter mount holes, webbing around the mains, frt mounting bosses etc.
                  -Don't assume your machine shop washes with an ultrasonic cleaner, ask. I don't know of a one in my area. Everyone here uses cabinet spray washers, which will not remove cooling system scale. Granted, I live in a small city of 100,000 people.
                  -Probe freeze plug openings to water passages for gunk

                  Comment

                  • Steve G.
                    Expired
                    • November 24, 2014
                    • 411

                    #24
                    Re: Engine Block Testing

                    Greg,
                    Yes, even hot tanking in caustic soda won't always remove everything, but it removed a lot more than the detergent and hot water sprayed on the outside of the block does today.

                    Working in the trade you'd have cars come in with leaking frost plugs, rusted right through from the inside. When you removed them the bottom of the block was full of rust in a paste form. No matter how many times you flushed it with all kinds of different solutions, you could never get it clean. And the frost plugs would keep rusting out. Hence the introduction of brass plugs.

                    What made it frustrating was that it was so avoidable. If people followed the recommended change interval for coolant (or quite using water in the non freezing season), it would never happen. In addition to the rusting of the cast parts the silicates leached out of the old anti-freeze and attached to the tubes of the radiator, plugging them with a hard calcium like deposit.

                    And this maintenance interval applies regardless of how much the car is driven. We have an Avanti that sat inside a heated building for probably 20 years without running more than a few minutes now and again. I did some work on it a couple of years ago and the thermostat housing was corroded almost all the way through. You don't wait until the antifreeze turns brown with rust to change it. It's too late by then.

                    That's my cooling system rant.

                    Steve

                    Comment

                    • Richard M.
                      Super Moderator
                      • August 31, 1988
                      • 11302

                      #25
                      Re: Engine Block Testing

                      Those photos of the rare 1960 heads I posted earlier were the tip of the iceberg on that engine build. It not only was a disaster, it was a nightmare. The young guy running the machine shop that my friend entrusted with his rare block and heads finally admitted what he did to "clean" both the heads and block decks. The whole story is in 2 different Thread here.....
                      https://www.forums.ncrs.org/showthre...ness-Tolerance

                      As Duke mentioned above, yes, he and I were on the phone several times to try to figure out the root cause after my initial post. The worst case scenario....I'm the 3rd party restoring the car. My friend gets the engine done at a shop referred by a different friend. I get the engine, and then have to R & R it 3 times due to shop machining, process, cleaning, and assembly errors.

                      Here's what I ended up with due to my machine shop nightmare.....


                      As far as oil passages are concerned, this different engine below was rebuilt by the same shop a year earlier and sat around. When I got it a year later, I immediately did some deck measurements and then brought it to MY machine shop for complete teardown, inspection, and "RE"-rebuild.

                      When I got a call that morning and the shop manager said you better come on down with your camera, I knew what I was in for.....

                      The oil galleys, previously and "allegedly" cleaned by the other shop during that rebuild, looked like this when I got there when he rodded them out in front of me. It's obvious what would happen to the oiling system and it's friction surfaces on this one if I didn't get it redone. BTW, this is exactly what happened to the first engine in the aforementioned thread above. The first shop owner blamed me for that. At least he was consistent, potentially ruining TWO rare blocks.

                      P2180002.jpgP2180003.jpgP2180004.jpgP2180005.jpgP2180007.jpgP2180008.jpgP2180009.jpgP2190021.jpgP2190022.jpgP2190023.jpgP2190024.jpg

                      And after the first shop "allegedly" cleaned the block decks, come to find out, on his FLAT TABLE BELT SANDER, my shop had to take several thousandths off to get them flat again. It took him 3 passes of 0.004" each, for a total of 0.012" to save the block. Obviously, there would be no chance to save a pad stamp using this corrective action.
                      100_3692.jpg100_3693.jpg100_3694.jpg100_3695.jpg

                      In the 2nd photo above, you can see the head of the shop's block milling machine. This block had already lost it's pad from being a previously decked, or should I say, "sanded" surface. At that time, I had asked my shop if the stamp pad surface could be saved. He said the milling head was too big, and in order to pass the diameter of the head properly over the decks, it has to get over the end of the block completely.

                      Maybe some machines have other capability, but since my main objective was to correct a defective block, this one had it's stamp pad erased as well. Since it was a "restoration" block, it didn't matter to me. This block only needed decking to correct errors from poor machine work. Don't let this happen to you.

                      I would in fact like to know exactly how a machine shop can save the stamp pad when it MUST be decked due to flaws like above, or to remove surface rust on old stored blocks etc.

                      How exactly is it done?

                      Rich
                      p.s. Sorry if my temperament got a little "edgy" above. Every time I recall this episode of madness, I get a little angry and my BP rises.
                      Attached Files

                      Comment

                      • Steve G.
                        Expired
                        • November 24, 2014
                        • 411

                        #26
                        Re: Engine Block Testing

                        Originally posted by Richard Mozzetta (13499)
                        Those photos of the rare 1960 heads I posted earlier were the tip of the iceberg on that engine build. It not only was a disaster, it was a nightmare. The young guy running the machine shop that my friend entrusted with his rare block and heads finally admitted what he did to "clean" both the heads and block decks. The whole story is in 2 different Thread here.....
                        https://www.forums.ncrs.org/showthre...ness-Tolerance

                        As Duke mentioned above, yes, he and I were on the phone several times to try to figure out the root cause after my initial post. The worst case scenario....I'm the 3rd party restoring the car. My friend gets the engine done at a shop referred by a different friend. I get the engine, and then have to R & R it 3 times due to shop machining, process, cleaning, and assembly errors.

                        Here's what I ended up with due to my machine shop nightmare.....


                        As far as oil passages are concerned, this different engine below was rebuilt by the same shop a year earlier and sat around. When I got it a year later, I immediately did some deck measurements and then brought it to MY machine shop for complete teardown, inspection, and "RE"-rebuild.

                        When I got a call that morning and the shop manager said you better come on down with your camera, I knew what I was in for.....

                        The oil galleys, previously and "allegedly" cleaned by the other shop during that rebuild, looked like this when I got there when he rodded them out in front of me. It's obvious what would happen to the oiling system and it's friction surfaces on this one if I didn't get it redone. BTW, this is exactly what happened to the first engine in the aforementioned thread above. The first shop owner blamed me for that. At least he was consistent, potentially ruining TWO rare blocks.

                        [ATTACH=CONFIG]57318[/ATTACH][ATTACH=CONFIG]57319[/ATTACH][ATTACH=CONFIG]57320[/ATTACH][ATTACH=CONFIG]57321[/ATTACH][ATTACH=CONFIG]57322[/ATTACH][ATTACH=CONFIG]57323[/ATTACH][ATTACH=CONFIG]57324[/ATTACH][ATTACH=CONFIG]57325[/ATTACH][ATTACH=CONFIG]57326[/ATTACH][ATTACH=CONFIG]57327[/ATTACH][ATTACH=CONFIG]57328[/ATTACH]

                        And after the first shop "allegedly" cleaned the block decks, come to find out, on his FLAT TABLE BELT SANDER, my shop had to take several thousandths off to get them flat again. It took him 3 passes of 0.004" each, for a total of 0.012" to save the block. Obviously, there would be no chance to save a pad stamp using this corrective action.
                        [ATTACH=CONFIG]57330[/ATTACH][ATTACH=CONFIG]57331[/ATTACH][ATTACH=CONFIG]57332[/ATTACH][ATTACH=CONFIG]57333[/ATTACH]

                        In the 2nd photo above, you can see the head of the shop's block milling machine. This block had already lost it's pad from being a previously decked, or should I say, "sanded" surface. At that time, I had asked my shop if the stamp pad surface could be saved. He said the milling head was too big, and in order to pass the diameter of the head properly over the decks, it has to get over the end of the block completely.

                        Maybe some machines have other capability, but since my main objective was to correct a defective block, this one had it's stamp pad erased as well. Since it was a "restoration" block, it didn't matter to me. This block only needed decking to correct errors from poor machine work. Don't let this happen to you.

                        I would in fact like to know exactly how a machine shop can save the stamp pad when it MUST be decked due to flaws like above, or to remove surface rust on old stored blocks etc.

                        How exactly is it done?

                        Rich
                        p.s. Sorry if my temperament got a little "edgy" above. Every time I recall this episode of madness, I get a little angry and my BP rises.
                        At the risk of raising your BP again, your experience was with two ends of a broad spectrum. Certainly the 1st shop was negligent in cleaning, but the "belt sander" deck surfacing is an industry standard. He did not dream up and build that piece of equipoment himself. It is perfectly adequate for 99% of the engines out there. What your shop did is reserved for the other 1% that have an eye on the second digit to the right of the decimal point on their ET cards.

                        There are two issues when looking at the deck. One is flat, the other is square. Flat is measured with a machinist's straight edge laid across the deck and a feeler gauge stuck under it to find any low spots. This is checking for flat.

                        It's quite obvious in your pics that what your shop was doing was checking for square. Square assures that the distance from the centreline of the crank to the deck surface is absolutely even across the entire surface. It then goes on to ensure that the other deck is exactly 90 degrees from the first deck. Then the bores are cut to be exactly 90 degrees to the squared deck. The whole point of this is to bring what was the oe tolerance down to 0. That is totally unnecessary in your kind of build.
                        The "sanding belt" method restores the flatness but follows the original squarness (or off square) that the block left the factory with.

                        In my list I left for the OP I specifically left checking the deck for square out. If the deck is flat why would you remove the stampings simply to improve upon the factory machining.

                        Steve

                        Comment

                        • Steve M.
                          Expired
                          • June 25, 2013
                          • 28

                          #27
                          Re: Engine Block Testing

                          I would leave the original block as-is and not rebuild it before I would deck it, and let it keep following the car around. It's the only solid evidence I've got that it's a 340 horse car from St Louis as tachs are easily changed.

                          I can hardly wait to pry the freeze plugs out and see what joy awaits.

                          Comment

                          • Steve G.
                            Expired
                            • November 24, 2014
                            • 411

                            #28
                            Re: Engine Block Testing

                            Originally posted by Steve Mitchell (58582)
                            I would leave the original block as-is and not rebuild it before I would deck it, and let it keep following the car around. It's the only solid evidence I've got that it's a 340 horse car from St Louis as tachs are easily changed.

                            I can hardly wait to pry the freeze plugs out and see what joy awaits.
                            The probability of that block actually needing surfacing are very low. Warpage is seldom an issue. Unless you see some very heavy pitting on the surface around the water jacket holes I would probably use it without even laying the straight edge on it. In fact, the service manual in print at the time neither calls for flatness check or gives a spec.
                            Surfacing is done almost as a routine because by the time you've got the surface clean enough to check with the straightedge you could have run it through the surfacer. Time and money. Seldom is it a necessity.
                            Steve

                            Comment

                            • Richard M.
                              Super Moderator
                              • August 31, 1988
                              • 11302

                              #29
                              Re: Engine Block Testing

                              Originally posted by Steve Mitchell (58582)
                              I would leave the original block as-is and not rebuild it before I would deck it, and let it keep following the car around. It's the only solid evidence I've got that it's a 340 horse car from St Louis as tachs are easily changed.

                              I can hardly wait to pry the freeze plugs out and see what joy awaits.
                              Steve, I agree that's a good plan. When you do remove the plugs, I think you know what awaits. It will be likely pocketed with years worth of sludge and rusty remnants.

                              I hope you don't mind my slightly off-topic information here, but hopefully good info for you and the masses as we all brainstorm how to avoid issues in our restoration tasks.


                              Originally posted by Steve Garner (60691)
                              At the risk of raising your BP again, your experience was with two ends of a broad spectrum. Certainly the 1st shop was negligent in cleaning, but the "belt sander" deck surfacing is an industry standard. He did not dream up and build that piece of equipoment himself. It is perfectly adequate for 99% of the engines out there. What your shop did is reserved for the other 1% that have an eye on the second digit to the right of the decimal point on their ET cards.

                              There are two issues when looking at the deck. One is flat, the other is square. Flat is measured with a machinist's straight edge laid across the deck and a feeler gauge stuck under it to find any low spots. This is checking for flat.

                              It's quite obvious in your pics that what your shop was doing was checking for square. Square assures that the distance from the centreline of the crank to the deck surface is absolutely even across the entire surface. It then goes on to ensure that the other deck is exactly 90 degrees from the first deck. Then the bores are cut to be exactly 90 degrees to the squared deck. The whole point of this is to bring what was the oe tolerance down to 0. That is totally unnecessary in your kind of build.
                              The "sanding belt" method restores the flatness but follows the original squarness (or off square) that the block left the factory with.

                              In my list I left for the OP I specifically left checking the deck for square out. If the deck is flat why would you remove the stampings simply to improve upon the factory machining.

                              Steve
                              Steve, Firstly, any advice is always welcome. My BP is fine, thanks.

                              I'm absolutely certain you have more experience with these issues than myself, but I have been told that using any type of belt sanding on block decks or heads is not recommended. I'm told it causes radiused edges on all holes, and in the case of coolant port holes can be problematic to get good gasket sealing. My (2nd) trusted machine shop said that they tried that many years ago on heads and it was disastrous. In the case of this engine block that I had the nightmare with, the shop turned the block upside down, hanging from a engine hoist, laid it down on the belt sanding table, which by the way had a belt with small stones about 1/8" diameter and greater, and probably what happened is that the block tilted and moved while the belt was running. To my amazement, I learned all of this long after the engine was back in the car. So you are absolutely correct, he didn't know what he was doing.

                              So yes, the "PROCESS" to use the sander was certainly wrong, and the machine may have been out of tolerance as I was told later, as the end result proved. I'm not entirely certain that even if perfectly fixtured and accurately positioned, that it could emulate the accuracy and tolerances that very expensive, room sized GM broaching machines performed originally. I have no scientific proof, but merely a opinion.

                              After days of diagnosis and testing trying to figure out why I had a volcano on my hands, I spent time with a much more knowledgeable and experienced shop. He then decked the heads, rebuilt them properly and had them waiting for the block to be corrected. As explained, I tried to get the engine owner to get MY new shop fix the block, but the first shop got re-involved......twice again unfortunately.

                              I understand you likely didn't read my entire thread above word for word as it gets a bit overwhelming and boring, but in fact, I was the one using the Surface Gage Block/Dial caliper. We could not get repeatable results using the straightedge and feeler gauge/flashlight method. I was checking for flatness over a condensed area to understand if the deck was within a reasonable range of flatness. As described, it was all over the place, especially the china wall ends. I wasn't looking for Zero tolerance as a result, but in this case it was severely opposite.

                              Rich

                              Comment

                              • Duke W.
                                Beyond Control Poster
                                • January 1, 1993
                                • 15610

                                #30
                                Re: Engine Block Testing

                                I've consulted a number of owners over the years on engine restorations, and it's always best if they can do the disassembly/inspection and assembly themselves. That way they have much better control of the project.

                                I always recommend what I call a "forensic disassembly", which includes measurements and inspections as the engine is disassembled, and it goes somethilng like this. (It's a good idea to take lots of photos and definitely record all the measurments and observations):

                                Once the heads, oil pan/windage tray, torsional damper, and flywheel are off:

                                1. Measure deck clearance of all eight cylinders. A few thou of slope end to end is not a big deal, but most will likely indicate good parallelsim with the cranshaft centerline. It's not unusual to see a difference in the left and right decks. If the left deck is high it can be milled down to equal the right deck and will not be visible when the engine is assembled. Different thickness head gaskets can also be used to equalize side to side compression ratio with different deck heights/clearances.

                                2. Use a machinists bar and .0015" feeler gage to determine any deck warpage. If .0015" feeler can be pulled out with equal force along the bar with the bar in various orientations, the deck is level and the heads should seal even with a shim type gasket. Compostion gaskets will usually seal with up to about .003" warp. (Do the same test on the head surface.)

                                3. Remove piston/rod assemblies and inspect rod bearings for wear/damage. Also inspect pistons for evidence of detonation damage and skirt scuffing.

                                4. Check cylinder walls for scoring and measure the bores for taper and out of round.

                                5. With only the crankshaft left to remove, slowly rotate it around and check for any drag variance. Then give it a good spin. If the bearings are in good condition and the crank is straight and the main saddles are in alignment, it should spin like it's on roller bearings.

                                6. Remove crankshaft and inspect for journal damage. Measure/record all journal diameters and compare to OE or undersize spec.

                                7. Inspect the bearings for signs of unusual wear or damage.

                                8. Once the main bearings have been removed use the machinists bar and .0015" feeler to check main bearing saddle alignment by comparing force to remove the feeler gage on all five saddles. It should be equal. If the bearings were in good condition and the crankshaft spun freely the saddles should easily pass this test.

                                9. Remove freeze plugs and mechanically remove any debris and scale from the block as best as you can.

                                10. Chase all threads with a proper size tap.

                                In most cases of an orginal or previously properly rebuilt engine, all that should be necessary for the block is cleaning, pressure testing, and boring/honing to the next piston oversize, if necessary. Opinons vary, but IMO if there is .003" or more taper or out of round at the top of the bores, they should be bored to the next oversize piston if you want a good seal and longevity.

                                In many cases, all that is necessary to prepare the block is cleaning and boring/honing, so you take the block to the shop and have a work order written out that specifically calls for these operations, only! The shop will also need the new pistons in order to finish hone the bore to the correct piston clearance.

                                Assuming the crankshaft journals are okay - either within OE spec or proper undersize that you measured, the crank should be mounted on a lathe or V-blocks and checked for runnout. Again, if it spun freely before you removed it, it's likely straight. Following successful Magnaflux imspection, the journals should be polished, and it's ready to go.

                                SHP/FI cranks have a special surface hardening applied by GM called Tufftride. ABOLUTELY, POSITIVELY DO NOT GRIND A TUFFRIDED CRANKSHAFT UNLESS ABSOLUTELY NECESSARY because it will remove the hardened surface and reduce crankshaft durabililty.

                                Any pre-'66 small block connecting rods are paper weights, IMO. The second design 327 rods can be used as is on 300 HP engines. They do not need to be resized or have new bolts installed as long as both bores measure within OE spec and they are not twisted, If the bearings looked good they are most likely okay, but a machine shop should be able to check for twist if you have any doubt.

                                For 350 HP engines and all pre-'66 engines new rods should be purchased, and the Eagle SIR5700 is much more robust than any OE rod and only cost about $250 for a set. Second design 327 rods that pass inspection, but are replaced on higher revving engines are a good "upgrade" for hydraulic lifter 283s and 250/300 HP 327s through '65 that originally had weak rods.

                                Make sure the machine shop has precision balancing equipment so they can properly balance the new rotating/reciprocating assembly. Because new parts like pistons and rods will have different mass than the removed parts, precision balancing is required to ensure smoothness. The shop will need the crank, all eights rods and pistons (so the rods can be balanced for equal big and small end mass and equal piston mass), a piston, a ring set, and a rod bearing.

                                The torsional damper and flywheel should be balanced statically. Then the clutch bolted to the flywheel and any additional mass should be added to the clutch cover. Then the flywheel and clutch cover should be clearly marked to indicate proper indexing upon installation. OE flywheels and clutches have a stamper "X" to indicte proper indexing to achieve the best static balance.

                                Duke

                                Comment

                                Working...

                                Debug Information

                                Searching...Please wait.
                                An unexpected error was returned: 'Your submission could not be processed because you have logged in since the previous page was loaded.

                                Please push the back button and reload the previous window.'
                                An unexpected error was returned: 'Your submission could not be processed because the token has expired.

                                Please push the back button and reload the previous window.'
                                An internal error has occurred and the module cannot be displayed.
                                There are no results that meet this criteria.
                                Search Result for "|||"