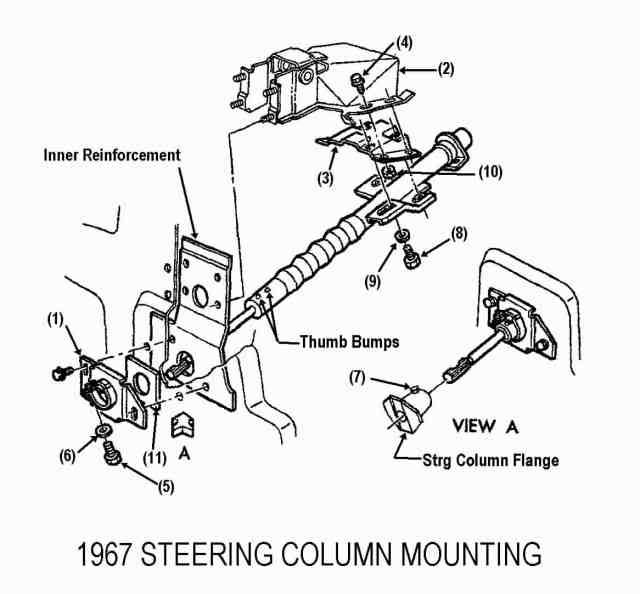
What is the preferred and easiest way to remove and replace the steering coupler between the steering box and steering column? Any tricks of the trade?
Once the clamp bolts are loosened, will the joint easily side on the column or will it need to be "encouraged" with a hammer or something? Mine is the original.
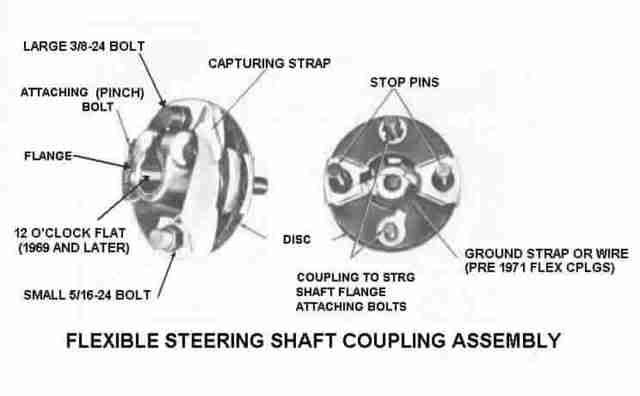
and lastly - Who sells the best quality replacement rag joint?
Thanks All!
Once the clamp bolts are loosened, will the joint easily side on the column or will it need to be "encouraged" with a hammer or something? Mine is the original.
and lastly - Who sells the best quality replacement rag joint?
Thanks All!


Comment