C1 Kick Panel and Heater Cover Install - NCRS Discussion Boards

C1 Kick Panel and Heater Cover Install

Collapse
X
 
  • Time
  • Show
Clear All
new posts
  • Richard H.
    Expired
    • March 1, 1985
    • 241

    C1 Kick Panel and Heater Cover Install

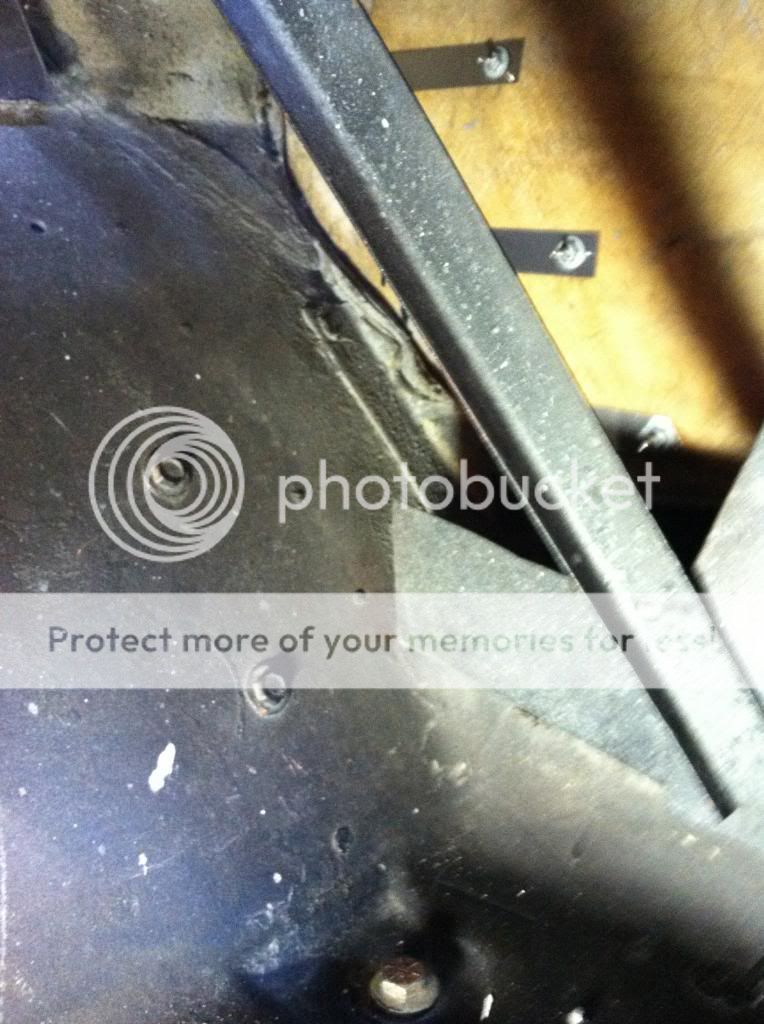
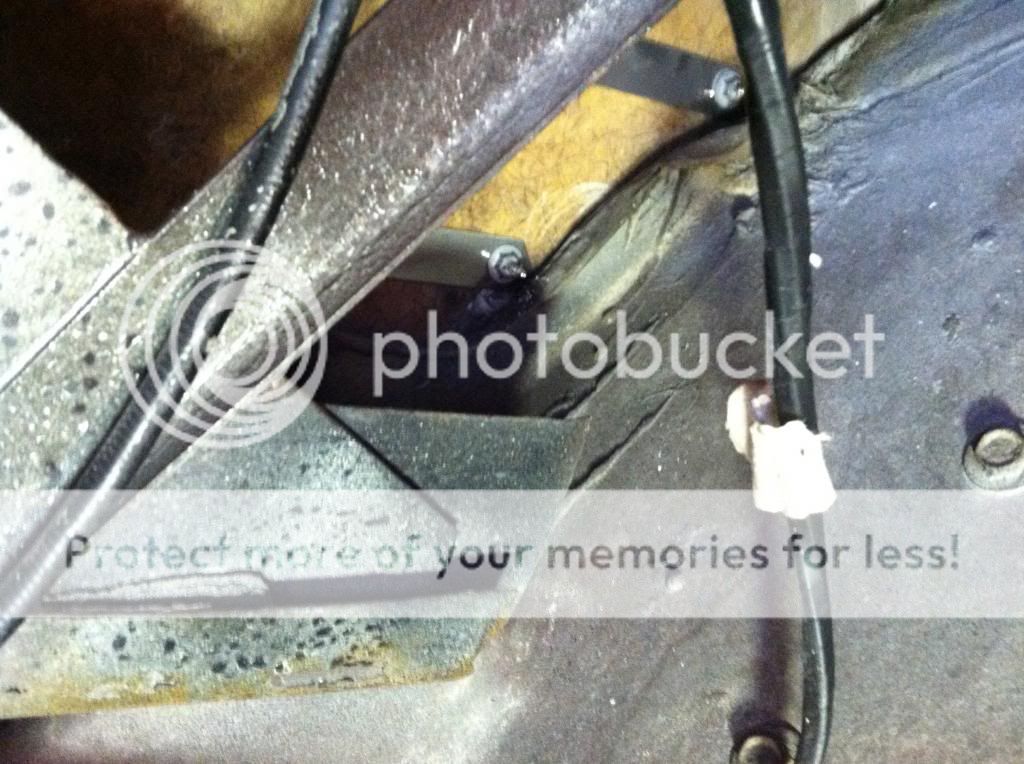
    Installing kick panels for the first time. It appears that the frame brackets to which they are mounted are not present. First picture is passenger side and second is driver side.


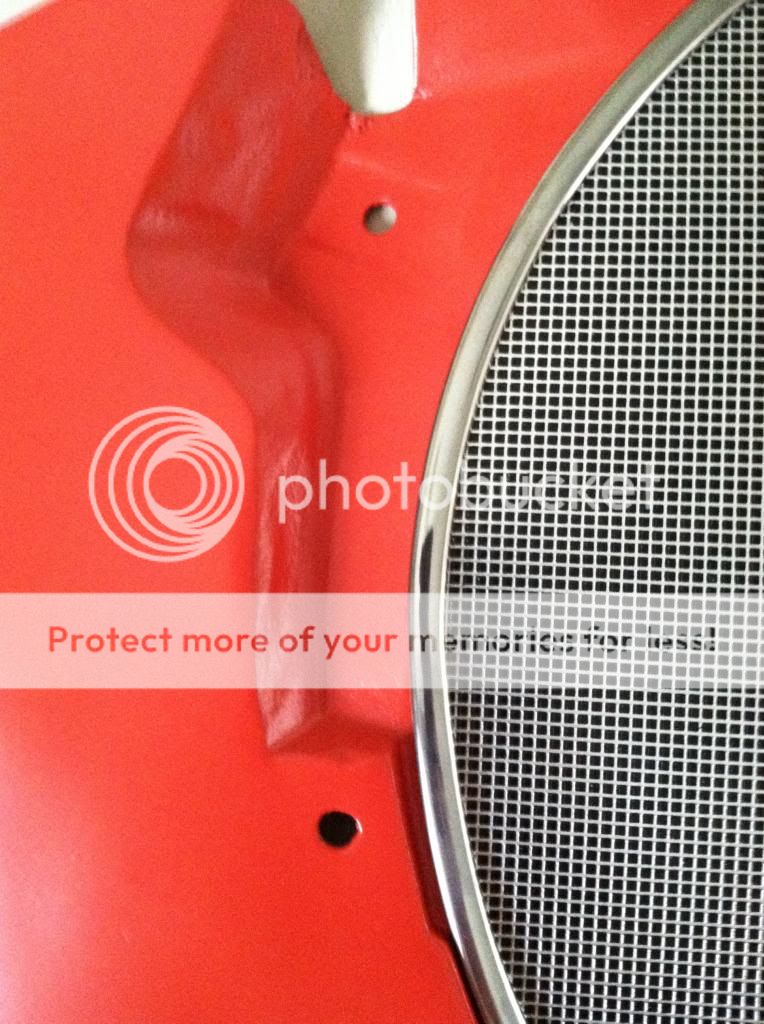
    Also, attaching the heater cover to the kick panel, there are two holes, yet they seem too large for screws to hold the pieces in place. It looks like it requires nuts on the end?

  • Bill M.
    Extremely Frequent Poster
    • April 1, 1977
    • 1386

    #2
    Re: C1 Kick Panel and Heater Cover Install

    These are the brackets on the pass. side of my '59. They are riveted to the body. The rivets are still on your car.

    Comment

    • Richard H.
      Expired
      • March 1, 1985
      • 241

      #3
      Re: C1 Kick Panel and Heater Cover Install

      Yes, I see. I will have to get the brackets. Now I know where they go. Also, it looks like the screws attaching the heater cover to the kick panel have a locking clip behind it. Thanks.

      Comment

      • Richard M.
        Super Moderator
        • August 31, 1988
        • 11302

        #4
        Re: C1 Kick Panel and Heater Cover Install

        Recently I've had to fabricate my own kick panel brackets because the suppliers had no stock. I just got a set for another car and waited since early June to get them. Order them quickly now before they disappear again.

        In order to install those brackets, you'll need to remove your splash shields to rivet from the outside in. Originally soft aluminum rivets were used, but you can use pop rivets to make it easier.

        As far as the heater cover, the AIM calls out for flat nuts in both of those locations on the right side. It's hard to reach in with your left arm, hold the flat nut, and install the screw with a screwdriver in your right hand in those 2 locations. I wish they had designed a provision for J-nuts in the kick panel for those heater cover screws.

        Be very careful when you install the heater cover. They are extremely tight to get in position, easily broken at the lower right tip, and can scratch both the kick panel and the radio console. It's scary to install these for fear of a costly error.

        This is the way I do it and it works for me.......
        I use a large thick plastic bag, like a Zip lock freezer bag thickness(2 ply). I tape it to the right side of the radio console just in front of the vertical ridge where the 3 J-nuts are. I place the heater cover in with the right side in against the kick panel, at an angle, and start to push the left side in along the radio console. The plastic will prevent scratching the console. Keep pushing until the cover "snaps" into the depression on the side of the console. Install screws and you're done. But...........just make sure your carpet is installed before you install the kick panel and heater cover, or you get to do it all over again.


        .

        Comment

        • Richard H.
          Expired
          • March 1, 1985
          • 241

          #5
          Re: C1 Kick Panel and Heater Cover Install

          Rich, I did order the brackets from CC, they were in stock. Thanks for the helpful hints.

          Comment

          Working...

          Debug Information

          Searching...Please wait.
          An unexpected error was returned: 'Your submission could not be processed because you have logged in since the previous page was loaded.

          Please push the back button and reload the previous window.'
          An unexpected error was returned: 'Your submission could not be processed because the token has expired.

          Please push the back button and reload the previous window.'
          An internal error has occurred and the module cannot be displayed.
          There are no results that meet this criteria.
          Search Result for "|||"